RStudioとGitHubを連携させて使えるようになるまでの道のり。
前回までに、RStudioとGit/GitHubとの連携が終了し、RStudioとGitHub間のコードのやり取り(Pull/Push)を行いました。
もう一人用のアーカイブとしてはこれで十分だと思いますが、一応、ブランチの作成までさらっと記録に残しておきます。
ブランチ(Branch)を作る必要性のある場面
ブランチが威力を発揮するのは、主に複数人で一つのプロジェクトを共同作業している場合。
一つのコードを複数で共有して、それぞれでコードを修正し、メインのブランチでまとめる(Merge)というイメージ。
今回は、GitHubからとRStudioから、それぞれBranchを作る方法と、Merge、Pullするところあたりをさらっと。
GitHubでブランチを作る場合
「New branch」から作る場合
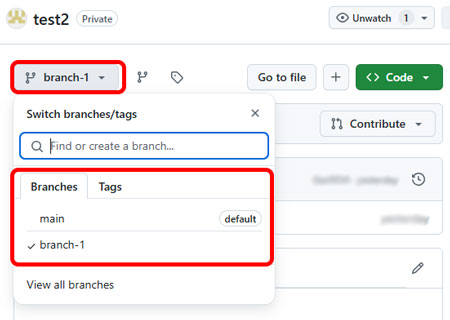
例えば、"test2"というプロジェクトがある。Branchのところを確認すると、
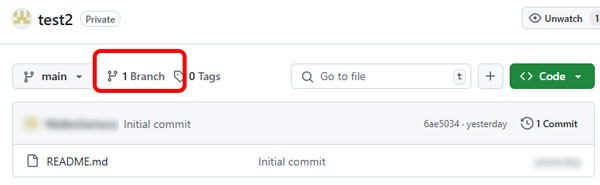
デフォルトの「main」のみ。
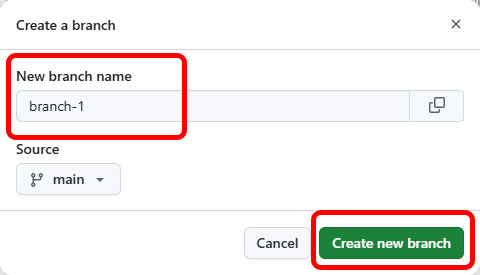
右上の「New branch」のボタンを押すと、新しいブランチが作られる。
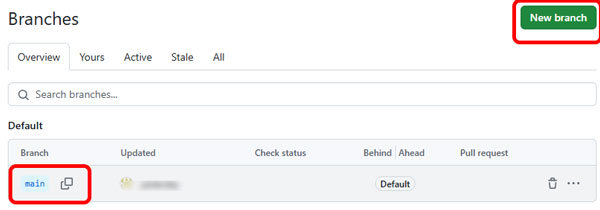
名前(今回は"branch-1")を入れて、「Create new branch」をクリック。
「main」の他に「branch-1」というブランチができた。
コードを先に編集した後にブランチを作る場合
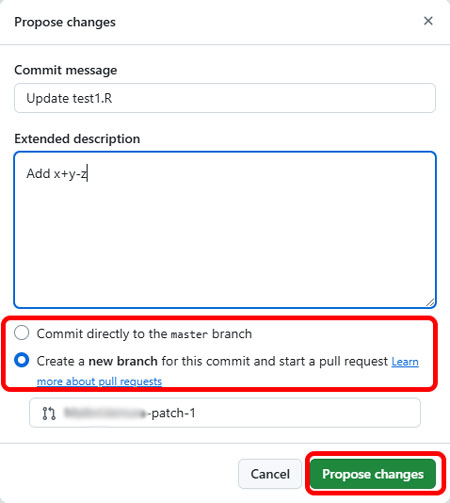
前回、GitHub上でコードを編集した後、「main」ブランチで直接修正するか、新たにブランチを作るか問われた。
ここで、「Create a new branch for this commit and start pull request」を選択して「Propose changes」を押すと、
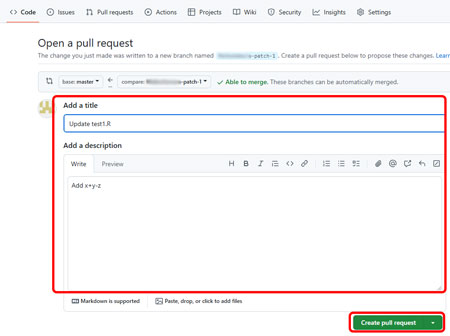
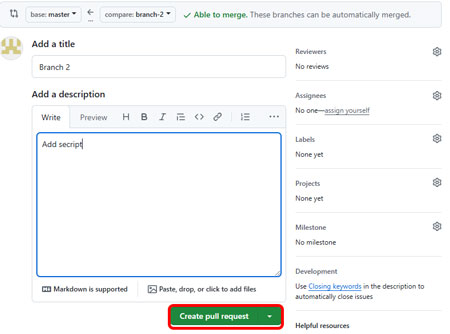
新しいブランチ名でPull request画面が現れる。
説明を記載して「Create pull request」。
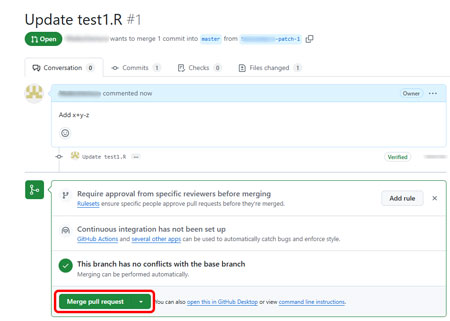
"main"ブランチの「Pull request」とコンフリクトが生じる場合は、その部分を調整してPull requestを「Merge」する。
RStudioからブランチを作る場合
RStudioからもブランチを作ることができる。
Gitタブにある「New Branch」のボタンをクリックして、

ブランチ名を記載。必要があれば「Add remote」でリモート名もつける。

ブランチからPushしてみる
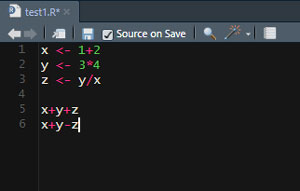
適当にコードを書いて、保存。
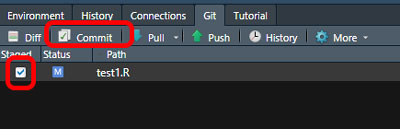
Gitのタブにパスが現れるので、「□Staged」に☑を入れて「Commit」。
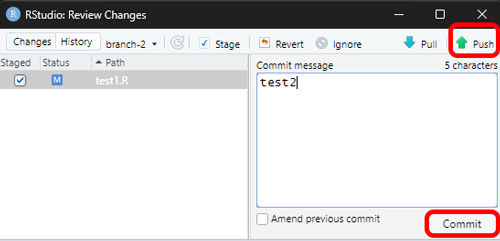
Commentを入力して、「Commit」。
「Push」でGitHubに送信。
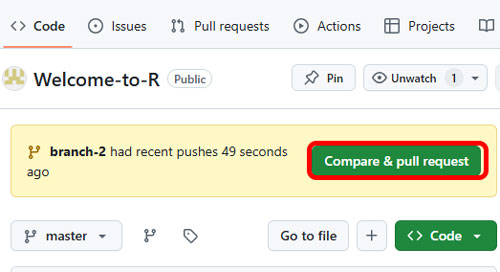
GitHubを開くと、新たに「branch-2」から「Compare & pull request」が届いていた。
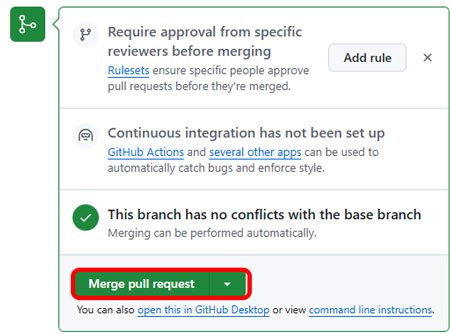
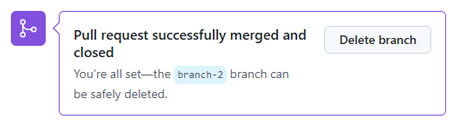
コードを「Merge」
特に他で作成したコードとコンフリクトがなければ、そのまま「Merge」して「Pull request」。
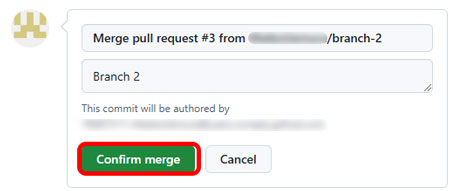
Merge成功。
※ コンフリクトが生じる場合は、調整して「Merge」。