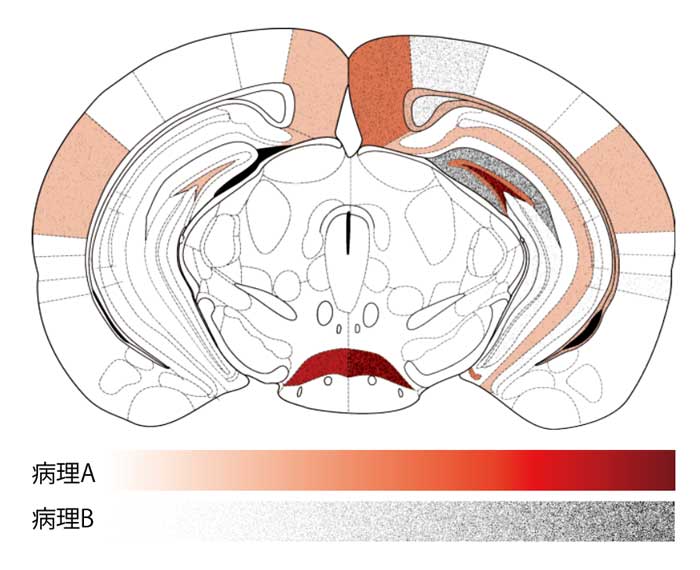
Heatmapのテンプレート作成中。
ドット模様のスケールが必要になったので、その備忘録。
ドット模様(ハーフトーン)を作る
グラディエントの図を作成
まずは、グラディエントの図形を作成する。
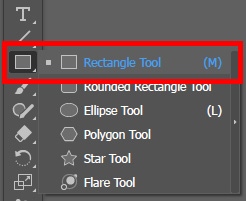
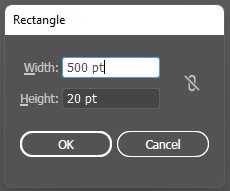
「M」(もしくは、ツールバーから四角形のアイコンを選択)で長方形を作成し、
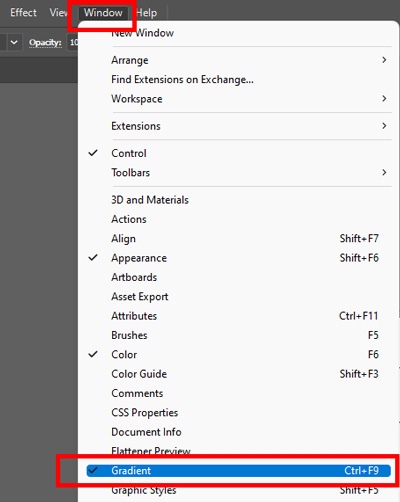
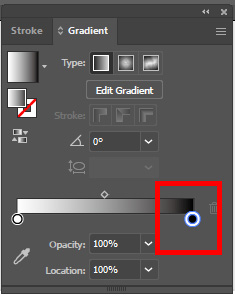
「G」でグラディエント。(グラディエントツールの表示は「Ctrl + 9」、もしくは上のタブから「Window」→「Gradient」。)
こんな感じで白→黒のグラディエントを作成。

で、high scoreの部分は塗りつぶしたくないので、グラディエントの黒の部分を灰色(K=50%)に変更。
黒の部分の黒丸をダブルクリックしてパレットを表示し、
K=50%に変更。
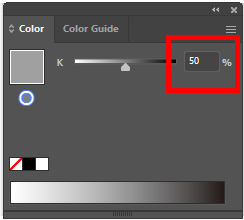
こんな感じの、白→灰色のグレースケールバーができる。

ハーフトーンを作成
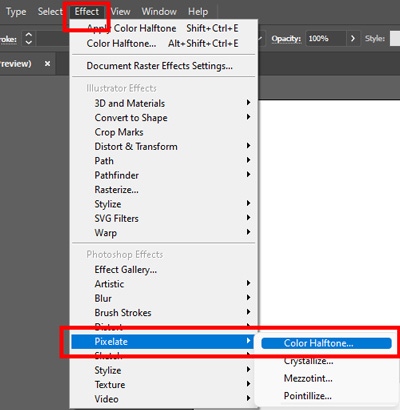
上図のグラディエントバーをハーフトーンに変える。
上のタブから「効果(Effect)」→「ピクセレート(Pixerate)」→「カラーハーフトーン(Color Halftone)」を選択。
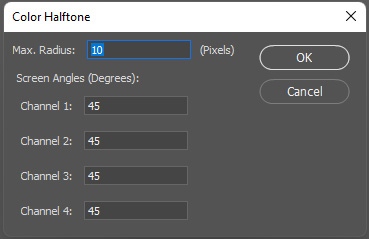
設定を
- Max. Radius: 10 Px
- Screen Angles: 45°
に設定すると、
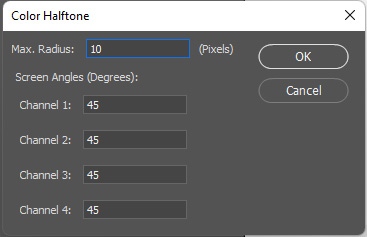
こんな感じのハーフトーンができあがる。

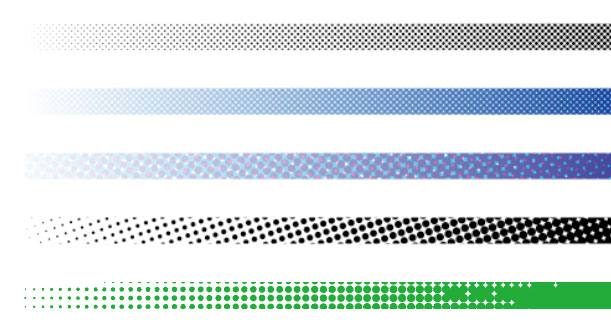
ハーフトーンの色々
例1
例えば、下記のような白黒グラディエントで、

- Max. Radius: 10 Px
- Screen Angles: 45°
に設定すると、
こんな感じ。

例2
- Max. Radius: 20 Px
- Screen Angles: 45°
に設定すると、
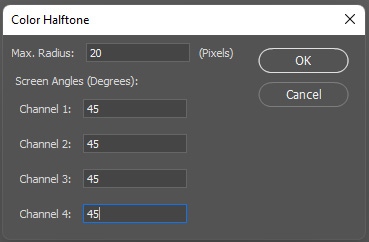
こんな感じ。

例3
- Max. Radius: 10 Px
- Screen Angles: 90°
に設定すると、
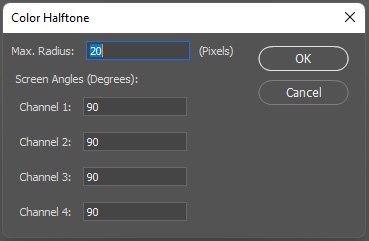
こんな感じ。

例4
カラーのグラディエントを作って、

それぞれのチャネルの角度をばらばらに設定すると、
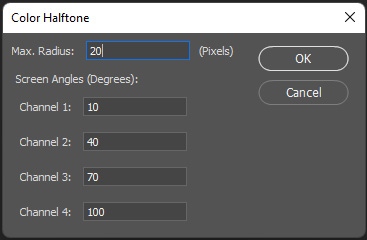
こんな感じのきれいなハーフトーンができる。

ハーフトーンの内容を変更したい場合
一度作ったハーフトーンの内容を色々変更したい場合は、「アピアランス」パネルを出して、「塗り」の部分の function をクリックする。
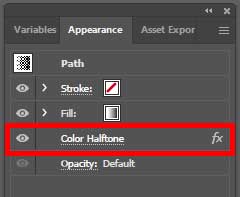
すると、再びハーフトーンの設定画面が開くので、そこで修正する。
ハーフトーンの色を変える
例えば下記ハーフトーンの色をグリーンに変えたい場合。

① カラーの編集機能を使う
単純なカラーだったら、「編集」→「カラーの編集」→「カラーバランス」で色を編集するとよい。
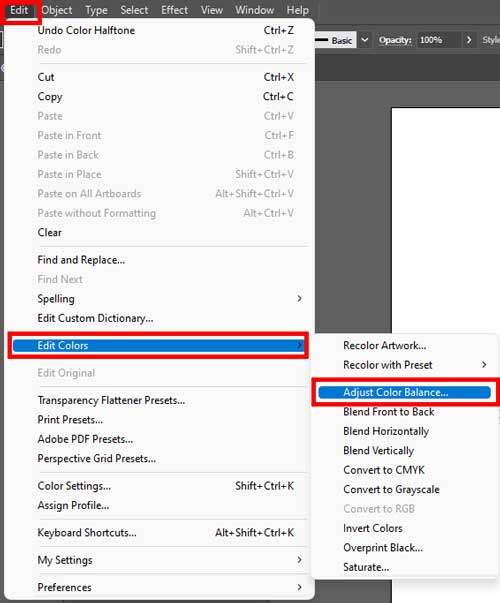
カラーモードが RGBだったら RGB、CMYKにしていたらCMYKで編集できる。
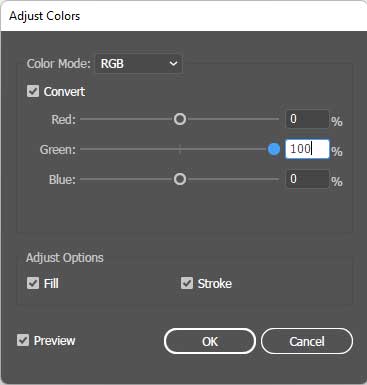
例えば上記のように設定を変更すると、

緑色に変わる。
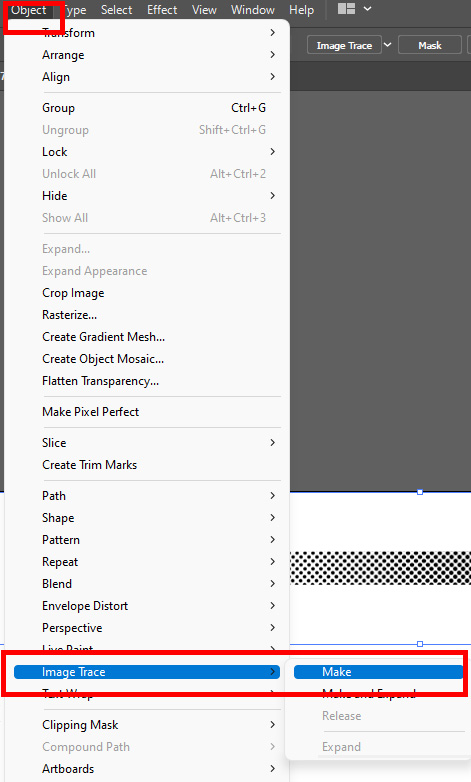
② イメージトレースでオブジェクトに変換して編集
模様一つ一つをオブジェクトに変換して編集することもできる。
その場合、パターン自体を再編集(ドットの大きさや配置など)はできないけど、例えば模様の複数個だけ色を変えたいなどはこちらの方法で可能。
方法は、まず、画像を選択した状態で、「Object」→「Expand Appearance」
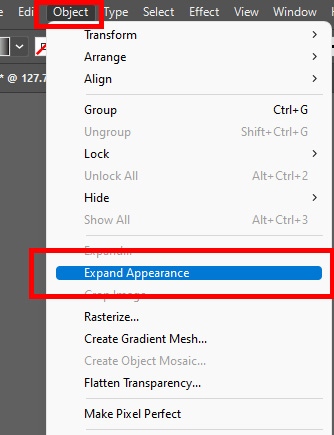
アピアランスに拡張される。

で、イメージトレース。
「Object」→「Image Trace」→「Make」
すると、画像全体がトレースされ、

1ずつオブジェクトに変換される。
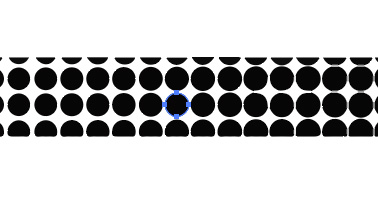
あとは、好きな色を選択すればOK