Windows11ファイアウォールの特定ポート番号の通信を許可する方法。
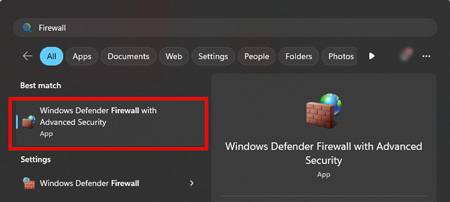
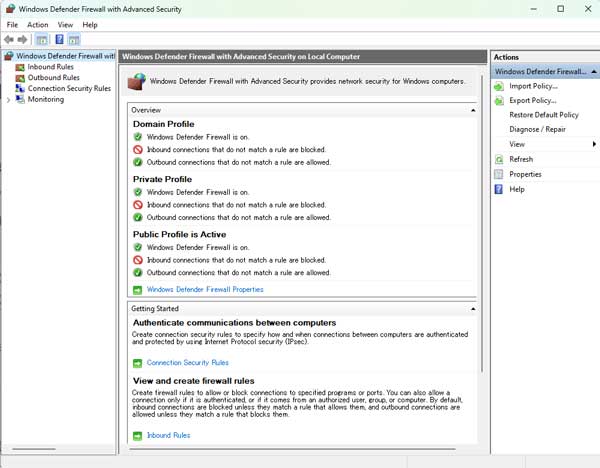
Win -> firewall と入れ、Windows Defender Firewall with Advanced Security を開く。
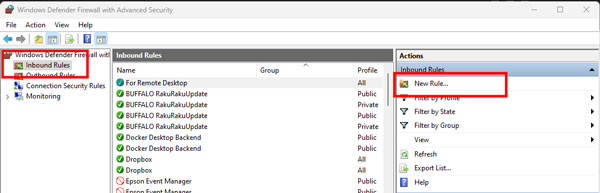
左側の欄で "受信の規則(Inbound Role)" を選択し、右側の欄で "新しい規則(New Role)" を選択する。
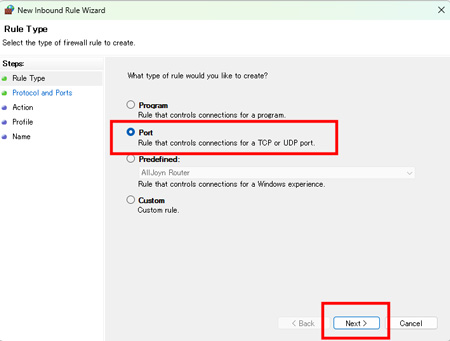
"Rule Type" -> "Port" を選択して "Next"。
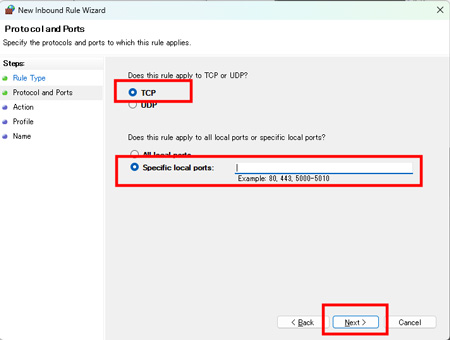
"Protocol and Ports" -> "TCP" を選択し、開放したいポート番号を入力する。
(Eg. リモート・デスクトップ:3389、SSH:22、RStudio SErver:8787 etc.)
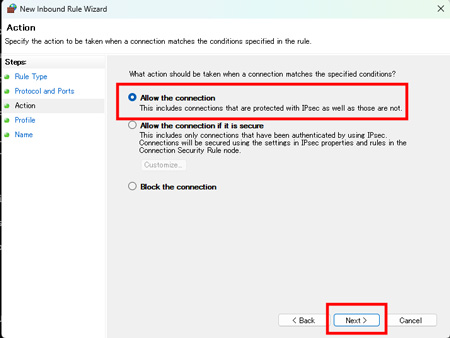
"Action" -> "Allow the connection" を選択し、"Next"。
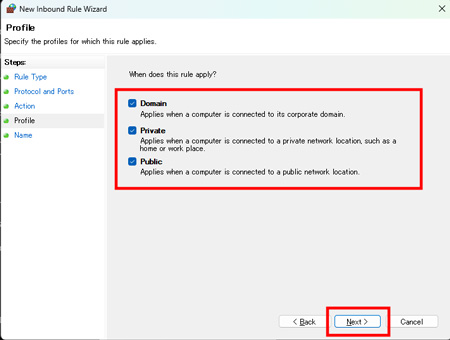
"Profile" -> "Domain", "Private", "Public" すべてにチェックをいれ、"Next"。
ルールの名前とそのルールの説明を簡単に記載し、"Finish"。

ポート開放のルールが適応される。
ただし、不正アクセスのリスクが高くて危険になるので、使用するポートの番号を変えたり、VPN接続にしたり、公開鍵と秘密鍵を設定したり等、色々セキュリティ対策を講じた方がよい。